Custom Search
Showing posts with label Linux administration. Show all posts

How to add user to a group in Linux operating system

We can assign user to a group during adding a new user account. But how do we add existing user to a group? This tutorial is a guide on how to add user to a new group. The right Linux command for the job is the usermod command.

This is some information about Linux usermod command from manual page:

NAME
usermod - modify a user account

SYNOPSIS
usermod [options] LOGIN

DESCRIPTION
The usermod command modifies the system account files to reflect the
changes that are specified on the command line.


As you can see, the Linux usermod command can be used to modify a user account. However in this tutorial, we'll only use usermod command to add user to a new group. For this example, we'll create a new group to practice. Use the groupadd command to create a new group:

luzar@ubuntu:~$ groupadd programmer
groupadd: unable to lock group file
luzar@ubuntu:~$ sudo groupadd programmer
[sudo] password for luzar:
luzar@ubuntu:~$

Don't forget to use sudo command in Ubuntu, else you'll get the groupadd: unable to lock group file error as in the example above. Check whether the programmer group has been created in /etc/group file:

luzar@ubuntu:~$ less /etc/group | grep programmer
programmer:x:1001:
luzar@ubuntu:~$

Next, we are going to add user to a new group. For this example, we are going to add a user called luzar to the programmer group. Below are step by step instructions.

Use usermod -G option to add user to a new group:

luzar@ubuntu:~# sudo usermod -G programmer luzar

Use Linux groups command to check whether the programmer group has been added to luzar's group:

luzar@ubuntu:~# groups luzar
luzar : users programmer
luzar@ubuntu:~#

As you can see, the user luzar now has programmer as a second group. We can also check /etc/group to verify user currently in the programmer group:

luzar@ubuntu:~$ less /etc/group | grep programmer
programmer:x:1001:luzar
luzar@ubuntu:~$

That's all.

How to power off Ubuntu server with Linux shutdown command

The Linux shutdown command has several options that you can use to bring down the Linux system. In the previous post, we've seen how to reboot Ubuntu server with shutdown command. In this post,  we are going to use the Linux shutdown command again. This time is to power off the Ubuntu server.

There are several options available with shutdown command that can be used to power off Linux system. One example is -h option, which means to halt the system after it has been brought down. We can add other things such as a comment message when invoking shutdown -h command. As you can see from the example of Ubuntu restart post before, we have to specify a time argument after the shutdown option so the system know when to shutdown the system. Here are some examples on how to power off Ubuntu server using shutdown command with other things that you can do:

1) Using Linux shutdown command with -h option example:

luzar@ubuntu:~$ sudo shutdown -h now
[sudo] password for luzar:

Broadcast message from luzar@ubuntu
        (/dev/pts/0) at 11:32 ...

The system is going down for halt NOW!

The example above show a basic shutdown command used to power off Ubuntu server. We used '-h' option and a time argument 'now' which means to bring down the system after we press enter.

 2) Using Linux shutdown command -p option example:

luzar@ubuntu:~$ sudo shutdown -h -P +1

Broadcast message from luzar@ubuntu
        (/dev/pts/0) at 11:47 ...

The system is going down for power off IN ONE MINUTE! 

The example above shows the '-P' option is added after the '-h' option. The -P option means 'power off'. When -P is used after -h option, it means we tell the system to power off after the system halt. Also this time we used +1 in the time argument. That means we want to bring down the system after 1 minute.

3) If you have to warn all your users, you can write a message after the time argument. See the example below:

luzar@ubuntu:~$ sudo shutdown -h -P +3 Please save your work now!

Broadcast message from luzar@ubuntu
        (/dev/pts/0) at 11:57 ...

The system is going down for power off in 3 minutes!
Please save your work now!
shutdown: Shutdown cancelled

If you want to cancel shutdown after invoked the command, you can press Ctrl+C combination keys. That will work if you do not use the 'now' time argument. If you just want to warn users to log out and prevent other user to login without actually bring the system down, you can use '-k' option.

luzar@ubuntu:~$ sudo shutdown -k +3 Please save your work now!

Broadcast message from luzar@ubuntu
        (/dev/pts/0) at 12:11 ...

The system is going down for maintenance in 3 minutes!
Please save your work now!
luzar@ubuntu:~$

That's all.

How to change hostname in Ubuntu server

Change a hostname in Ubuntu server is very easy. From the command line terminal, type hostname newname. View the new hostname with hostname command. See the step by step example on how to change Ubuntu server hostname below:


1) View current hostname:

luzar@hitam:~$ hostname
hitam
luzar@hitam:~$


2) Change hostname and view latest hostname:

luzar@hitam:~$ sudo hostname ubuntu
luzar@hitam:~$ hostname
ubuntu
luzar@hitam:~$


See, that's how easy it is. Heh, don't fall for it. That doesn't change anything. The hostname is still the same as you can see at the prompt. Even reboot won't change anything. The exact method to change the hostname permanently is by editing /etc/hostname file. Here is the step:


1) Open /etc/hostname with your favorite text editor:

luzar@hitam:~$ sudo vim /etc/hostname
[sudo] password for luzar:


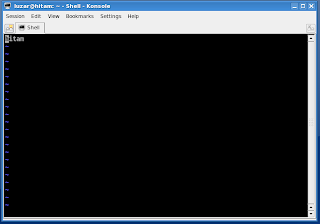
Here the vim /etc/hostname screenshot:


Now you can change hostname and save. The changed is permanent even after you reboot your system.

Important: You also need to edit the /etc/hosts file and apply the changes. Otherwise, you won't be able to use sudo after the reboot.

That's it.

Ubuntu tail log tutorial

Sometimes we need to view just a part of a big Ubuntu file. For example. when we are going to locate error or check system activity in Ubuntu system log. Ubuntu command that can be used to check for latest log generated by the system is tail command. The tail command by default displays last 10 lines in the file.

Here is part of tail manual page that describes the usage:

NAME
       tail - output the last part of files

SYNOPSIS
       tail [OPTION]... [FILE]...

DESCRIPTION
       Print  the  last 10 lines of each FILE to standard output.
       With more than one FILE, precede each with a header giving
       the file name.  With no FILE, or when FILE is -,
       read standard input.

If we are going to check latest system log, we can issue tail /var/log/messages command. See an example below:

luzar@ubuntu:/var/log$ tail /var/log/syslog
Feb 11 09:30:01 ubuntu console-kit-daemon[5150]: CRITICAL: 
cannot initialize libpolkit
Feb 11 09:30:01 ubuntu /USR/SBIN/CRON[5213]: (root) CMD ([ -x 
/usr/sbin/update-motd ] && /usr/sbin/update-motd 2>/dev/null)
Feb 11 09:32:12 ubuntu dhclient: DHCPREQUEST of 172.16.153.129 on eth0 
to 172.16.153.254 port 67
Feb 11 09:32:12 ubuntu dhclient: DHCPACK of 172.16.153.129 from 172.16.153.254
Feb 11 09:32:12 ubuntu dhclient: bound to 172.16.153.129 -- renewal in 899 seconds.
Feb 11 09:40:01 ubuntu console-kit-daemon[5260]: CRITICAL: 
cannot initialize libpolkit
Feb 11 09:40:01 ubuntu /USR/SBIN/CRON[5323]: (root) CMD ([ -x 
/usr/sbin/update-motd ] && /usr/sbin/update-motd 2>/dev/null)
Feb 11 09:47:11 ubuntu dhclient: DHCPREQUEST of 172.16.153.129 on eth0 
to 172.16.153.254 port 67
Feb 11 09:47:11 ubuntu dhclient: DHCPACK of 172.16.153.129 from 172.16.153.254
Feb 11 09:47:11 ubuntu dhclient: bound to 172.16.153.129 -- renewal in 883 seconds.
luzar@ubuntu:/var/log$

We can use tail to check latest messages generated by system log, we can issue tail /var/log/messages command. See an example below:

luzar@ubuntu:~$ tail /var/log/messages
Feb 11 09:06:04 ubuntu kernel: [    8.354312] lp0: using parport0 
(interrupt-driven).
Feb 11 09:06:04 ubuntu kernel: [    8.427308] Adding 489940k swap on /dev/sda5.
Priority:-1 extents:1 across:489940k
Feb 11 09:06:04 ubuntu kernel: [    8.462337] EXT3 FS on sda1, internal journal
Feb 11 09:06:04 ubuntu kernel: [    8.707586] ip_tables: (C) 2000-2006 
Netfilter Core Team
Feb 11 09:06:04 ubuntu kernel: [    8.746051] eth0: link up
Feb 11 09:06:04 ubuntu kernel: [   13.362431] NET: Registered protocol family 17
Feb 11 09:06:04 ubuntu kernel: [   20.601093] NET: Registered protocol family 10
Feb 11 09:06:04 ubuntu kernel: [   20.611324] lo: Disabled Privacy Extensions
Feb 11 09:26:09 ubuntu -- MARK --
Feb 11 09:46:09 ubuntu -- MARK --
luzar@ubuntu:~$

Remember that tail command is very useful command when troubleshooting error during Ubuntu server configuration.

Ubuntu aptitude upgrade

Beside apt package management, Ubuntu has another package management called aptitude. Aptitude is a high-level interface to the package manager originally from Debian. It has two interface, the visual interface and a command line interface. Here, is a guide of aptitude command line interface run in Ubuntu server command line terminal.


First run the aptitude update command to find updates from Ubuntu support server. Here is an example of aptitude update command:


luzar@ubuntu:~$ sudo aptitude update
[sudo] password for luzar:
Get:1 http://security.ubuntu.com hardy-security Release.gpg [189B]
Ign http://security.ubuntu.com hardy-security/main Translation-en_US
Ign http://security.ubuntu.com hardy-security/restricted Translation-en_US
Ign http://security.ubuntu.com hardy-security/universe Translation-en_US
Ign http://security.ubuntu.com hardy-security/multiverse Translation-en_US
Get:2 http://security.ubuntu.com hardy-security Release [58.5kB]Hit http://us.archive.ubuntu.com hardy Release.gpg.........
Fetched 960kB in 17s (56.3kB/s)Reading package lists... Done
luzar@ubuntu:~$


After finish the aptitude command, run aptitude upgrade command to install updated software. Here is an aptitude upgrade command example:


luzar@ubuntu:~$ sudo aptitude upgrade
W: The "upgrade" command is deprecated; use "safe-upgrade" instead.
Reading package lists... Done
Building dependency tree
Reading state information... Done
Reading extended state information
Initializing package states... Done
Building tag database... Done
The following packages have been automatically kept back:
libbind9-30 libisc32 libisccc30 libisccfg30
The following packages have been kept back:
bind9 bind9-host dnsutils linux-image-server linux-server
0 packages upgraded, 0 newly installed, 0 to remove and 9 not upgraded.
Need to get 0B of archives. After unpacking 0B will be used.
Reading package lists... Done
Building dependency tree
Reading state information... Done
Reading extended state information
Initializing package states... Done
Building tag database... Done
luzar@ubuntu:~$

Ubuntu show installed packages tips

There are many methods used to show installed packages in Ubuntu server. However, you just need two methods to of showing installed packages. The first method is to print installed packages on the screen using the software package management utility, dpkg.


Here are some examples of Ubuntu show installed packages using dpkg command:


dpkg example 1 - List all installed pakages:


luzar@ubuntu:~$ dpkg -l | less


Below is the result of the above command. You can view next screen by pressing spacebar key or scroll down by line using arrow key.


Desired=Unknown/Install/Remove/Purge/Hold
| Status=Not/Installed/Config-f/Unpacked/Failed-cfg/Half-inst/t-aWait/T-pend
|/ Err?=(none)/Hold/Reinst-required/X=both-problems (Status,Err: uppercase=bad)
||/ Name Version Description
+++-================================================================-==============
ii adduser 3.105ubuntu1 add and remove users and groups
ii apache2 2.2.8-1ubuntu0.3 Next generation, scalable, extendable web se
ii apache2-mpm-prefork 2.2.8-1ubuntu0.3 Traditional model for Apache HTTPD
ii apache2-utils 2.2.8-1ubuntu0.3 utility programs for webservers
ii apache2.2-common 2.2.8-1ubuntu0.3 Next generation, scalable, extendable web se
ii apparmor 2.1+1075-0ubuntu9.1 User-space parser utility for AppArmor
ii apparmor-utils 2.1+1075-0ubuntu9.1 Utilities for controlling AppArmor
ii apt 0.7.9ubuntu17.1 Advanced front-end for dpkg
ii apt-utils 0.7.9ubuntu17.1 APT utility programs
ii aptitude 0.4.9-2ubuntu5 terminal-based package manager
ii at 3.1.10ubuntu4 Delayed job execution and batch processing
ii base-files 4.0.1ubuntu5.8.04.2 Debian base system miscellaneous files
ii base-passwd 3.5.16 Debian base system master password and group
ii bash 3.2-0ubuntu18 The GNU Bourne Again SHell
ii bash-completion 20060301-3ubuntu3 programmable completion for the bash shell
ii belocs-locales-bin 2.4-2.2ubuntu7 tools for compiling locale data files
ii bind9 1:9.4.2-10 Internet Domain Name Server
ii bind9-doc 1:9.4.2.dfsg.P2-2 Documentation for BIND
ii bind9-host 1:9.4.2-10 Version of 'host' bundled with BIND 9.X
ii bsdmainutils 6.1.10ubuntu2 collection of more utilities from FreeBSD
ii bsdutils 1:2.13.1-5ubuntu2 Basic utilities from 4.4BSD-Lite
ii busybox-initramfs 1:1.1.3-5ubuntu12 Standalone shell setup for initramfs
:


dpkg example 2 - List installed pakages by name:


luzar@ubuntu:~$ dpkg -l | grep apache
ii apache2 2.2.8-1ubuntu0.3 Next generation, scalable, extendable web server
ii apache2-mpm-prefork 2.2.8-1ubuntu0.3 Traditional model for Apache HTTPD
ii apache2-utils 2.2.8-1ubuntu0.3 utility programs for webservers
ii apache2.2-common 2.2.8-1ubuntu0.3 Next generation, scalable, extendable web server
ii libapache2-mod-php5 5.2.4-2ubuntu5.3 server-side, HTML-embedded scripting language
luzar@ubuntu:~$


The other method is to search installed packages using aptitude package management utility. The aptitude can search for keywords contain in software package description. This is pretty helpful in a situation where you can't remember the exact package name.


Here is an example of aptitude command using search option:


luzar@ubuntu:~$ aptitude search \apache
i apache2 - Next generation, scalable, extendable web server
v apache2-dev -
p apache2-doc - documentation for apache2
v apache2-mpm -
p apache2-mpm-event - Event driven model for Apache HTTPD
p apache2-mpm-itk - multiuser MPM for Apache 2.2
p apache2-mpm-perchild - Transitional package - please remove
i apache2-mpm-prefork - Traditional model for Apache HTTPD
p apache2-mpm-worker - High speed threaded model for Apache HTTPD
p apache2-prefork-dev - development headers for apache2
p apache2-src - Apache source code
p apache2-threaded-dev - development headers for apache2
i apache2-utils - utility programs for webservers
i apache2.2-common - Next generation, scalable, extendable web server
p apachetop - Realtime Apache monitoring tool


The aptitude search command is going to print a long list of results. It's best if you use aptitude search pipe less option so you scroll by page or by line.


luzar@ubuntu:~$ aptitude search \apache | less


The aptitude show option can be used to show information about a package:


luzar@ubuntu:~$ aptitude show apache2-src
Package: apache2-src
State: not installed
Version: 2.2.8-1ubuntu0.3
Priority: extra
Section: devel
Maintainer: Ubuntu Core Developers
Uncompressed Size: 6349k
Description: Apache source code
This package includes the complete and patched source code for the Apache HTTPD.
It is useful for other packages to build-depend on in order to build
custom MPMs.
Homepage: http://httpd.apache.org/

Ubuntu update command line

Here is a guide for Ubuntu update in command line. There are two two commands you need to run. The first command is sudo apt-get update command to scan for available packages to update from Ubuntu support. If the update found a security patch or software packages update, then you need to run the next command which is sudo apt-get upgrade to install the updates. You must have Internet connection to run the command.

Here are example of Ubuntu update in command line:


luzar@ubuntu:~$ sudo apt-get update
Hit http://us.archive.ubuntu.com hardy Release.gpg
Get:1 http://security.ubuntu.com hardy-security Release.
gpg [189B]Ign http://security.ubuntu.com hardy-security/main Translation-en_US
Ign http://security.ubuntu.com hardy-security/restricted Translation-en_US
Ign http://security.ubuntu.com hardy-security/universe Translation-en_US
Ign http://security.ubuntu.com hardy-security/multiverse Translation-en_US
Get:2 http://security.ubuntu.com hardy-security Release [58.5kB]
Get:3 http://security.ubuntu.com hardy-security/main Packages [67.9kB]
Ign http://us.archive.ubuntu.com hardy/main Translation-en_US
Get:4 http://security.ubuntu.com hardy-security/restricted Packages [7159B]
Ign http://us.archive.ubuntu.com hardy/restricted Translation-en_US
Get:5 http://security.ubuntu.com hardy-security/main Sources [15.2kB]
Ign http://us.archive.ubuntu.com hardy/universe Translation-en_US
Get:6 http://security.ubuntu.com hardy-security/restricted Sources [1092B]
Ign http://us.archive.ubuntu.com hardy/multiverse Translation-en_US
Get:7 http://security.ubuntu.com hardy-security/universe Packages [41.2kB]
Get:8 http://us.archive.ubuntu.com hardy-updates Release.gpg [189B]
Get:9 http://security.ubuntu.com hardy-security/universe Sources [7068B]
Ign http://us.archive.ubuntu.com hardy-updates/main Translation-en_US
Ign http://us.archive.ubuntu.com hardy-updates/restricted Translation-en_US
Ign http://us.archive.ubuntu.com hardy-updates/universe Translation-en_US
Ign http://us.archive.ubuntu.com hardy-updates/multiverse Translation-en_US
Hit http://us.archive.ubuntu.com hardy Release
Get:10 http://us.archive.ubuntu.com hardy-updates Release [58.5kB]
Get:11 http://security.ubuntu.com hardy-security/multiverse Packages [8637B]
Get:12 http://security.ubuntu.com hardy-security/multiverse Sources [14B]
Hit http://us.archive.ubuntu.com hardy/main Packages
Hit http://us.archive.ubuntu.com hardy/restricted Packages
Hit http://us.archive.ubuntu.com hardy/main Sources
Hit http://us.archive.ubuntu.com hardy/restricted Sources
Hit http://us.archive.ubuntu.com hardy/universe Packages
Hit http://us.archive.ubuntu.com hardy/universe Sources
Hit http://us.archive.ubuntu.com hardy/multiverse Packages
Hit http://us.archive.ubuntu.com hardy/multiverse Sources
Get:13 http://us.archive.ubuntu.com hardy-updates/main Packages [378kB]Get:14 http://us.archive.ubuntu.com hardy-updates/restricted Packages [7103B]Get:15 http://us.archive.ubuntu.com hardy-updates/main Sources [98.7kB]Get:16 http://us.archive.ubuntu.com hardy-updates/restricted Sources [1092B]Get:17 http://us.archive.ubuntu.com hardy-updates/universe Packages [141kB]Get:18 http://us.archive.ubuntu.com hardy-updates/universe Sources [32.6kB]Get:19 http://us.archive.ubuntu.com hardy-updates/multiverse Packages [23.8kB]Get:20 http://us.archive.ubuntu.com hardy-updates/multiverse Sources [4020B]
Fetched 953kB in 34s (27.9kB/s)Reading package lists... Done
luzar@ubuntu:~$


Running the apt-get upgrade command:


luzar@ubuntu:~$ sudo apt-get upgrade
Reading package lists... Done
Building dependency tree
Reading state information... Done
The following packages have been kept back:
bind9 bind9-host dnsutils libbind9-30 libisc32 libisccc30 libisccfg30
linux-image-server linux-server
The following packages will be upgraded:
apt apt-utils bind9-doc cpp-4.2 eject gcc-4.2-base initramfs-tools
iproute libapache2-mod-php5 libc6 libc6-i686 libdbus-1-3 libgcc1
libldap-2.4-2 liblwres30 libpcre3 libstdc++6 libxml2
linux-image-2.6.24-19-server pciutils php5-common php5-mysql
postfix procps python2.5 python2.5-minimal sudo tzdata ufw
update-manager-core xkb-data
31 upgraded, 0 newly installed, 0 to remove and 9 not upgraded.
Need to get 40.7MB of archives.After this operation, 24.6kB of additional disk space will be used.Do you want to continue [Y/n]? Y
Get:1 http://us.archive.ubuntu.com hardy-updates/main
gcc-4.2-base 4.2.4-1ubuntu3 [100kB]
Get:2 http://us.archive.ubuntu.com hardy-updates/main libgcc1 1:4.2.4-1ubuntu3 [23.3kB]
Get:3 http://us.archive.ubuntu.com hardy-updates/main cpp-4.2 4.2.4-1ubuntu3 [2486kB]
Get:4 http://us.archive.ubuntu.com hardy-updates/main libstdc++6 4.2.4-1ubuntu3 [332kB]
Get:5 http://us.archive.ubuntu.com hardy-updates/main libc6 2.7-10ubuntu4 [4307kB]12% [5 libc6 2299022/4307kB 53%] 201kB/s 2min56

Ubuntu terminal not responding tips

Have you ever seen this problem when using Ubuntu terminal? You run a command, then it just hang there, not responding. You press Enter, Esc, Ctrl+c, Ctrl+z, type anything but it won't respond. Well, I always have because I work in terminal a lot.

Don't worry. You do remember that Linux is multiuser and multitasking operating system, do you? So, we don't have to restart our Ubuntu system. Here is what I do:

1) Open other terminal and run ps command. Use grep command to grab the not responding terminal. We need the PID (process id) of the hanged command.


luzar@ubuntu:~$ ps aux | grep tty1
root 4356 0.0 0.2 2568 1212 tty1 Ss 13:04 0:00 /bin/login --
root 4362 0.0 0.3 4144 1808 tty1 S+ 13:05 0:00 -bashluzar
4619 0.0 0.1 3004 756 pts/0 R+ 14:05 0:00 grep tty1


2) Use the kill command to terminate the not responding process.


luzar@ubuntu:~$ sudo kill 4362
[sudo] password for luzar:
luzar@ubuntu:~$ ps aux | grep tty1
root 4624 0.0 0.1 1716 516 tty1 Ss+ 14:05 0:00 /sbin/getty 38400 tty1
luzar 4626 0.0 0.1 3004 756 pts/0 R+ 14:05 0:00 grep tty1


3) If it's still there, you can force terminate with kill -9 option or just kill the login terminal.


luzar@ubuntu:~$ sudo kill -9 4628
luzar@ubuntu:~$ ps aux | grep tty1
root 4632 0.0 0.0 1716 512 tty1 Ss+ 14:06 0:00 /sbin/getty 38400 tty1
luzar 4634 0.0 0.1 3004 752 pts/0 R+ 14:06 0:00 grep tty1


Here is what happened in the not responding terminal when we were using the kill command:

Ubuntu create group

A command used to create a group in Ubuntu is groupadd. It is a simple command. Here is an information about groupadd from the manual page:

NAME
groupadd - create a new group

SYNOPSIS
groupadd [-g GID [-o]] [-f] [-K KEY=VALUE] group

DESCRIPTION
The groupadd command creates a new group account using the values
specified on the command line plus the default values from the system.
The new group will be entered into the system files as needed.
The options in synopsis means:
  • -g GID means we can provide a group id to the new group. However the group id must be greater than 999 and hasn't been used by existing group.
  • -o permits to add a group with a non-unique GID.
  • -f will turn off -g group id you specified if it's already been used by the existing group. If the name of the new group you specified already exist, it will exit with success status.
  • -K KEY=VALUE overrides /etc/login.defs defaults (GID_MIN, GID_MAX and others).
The groupadd command can be used with no option. So, the format to create a new group can be as simple as:

groupadd new_group_name

Here is an example of Ubuntu create group using groupadd command:

luzar@ubuntu:~$ sudo groupadd itdept
[sudo] password for luzar:
luzar@ubuntu:~$
All Ubuntu groups were kept in one file. The location of the file is in /etc/group. We can view groups in Ubuntu using cat, less, more or text editor. Here is an example of Ubuntu /etc/group file:
luzar@ubuntu:~$ sudo less /etc/group
root:x:0:
daemon:x:1:
bin:x:2:
...
...
...
jimi:x:1002:
alex:x:1003:
itdept:x:1004:
See the itdept group that we created just now? We didn't specify a gid, so Ubuntu assigns a next gid from the existing groups.

Ubuntu command line text editor

Ubuntu command line text editor was included in the system by default when you install Ubuntu server. The text editor name is VIM - Vi IMproved. Vi is the famous text editor, which is installed by default in most Linux and other Unix-based text editor. It's not the ease of use that makes vi famous, but because vi is a very powerful text editor. It comes with powerful macro built and plugins.


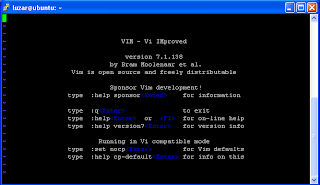
This is an example of vim. You can view vim by typing vi in the command line.

luzar@ubuntu:~$ vi

In Ubuntu, there are original vi and vim text editors. Type vi, you'll have vi and type vim, you'll get vim. They are the same, except vim is more user friendly and easier to use. For example, the noticeable different of up/down, left/right arrow keys and backspace/delete keys. Here are some information about vim from the manual page.

Name:
vim - Vi IMproved, a programmers text editor
Synopsis/vi syntax/vi format:
vim [options] [file ..]
vim [options] -
vim [options] -t tag
vim [options] -q [errorfile]

DESCRIPTION
Vim is a text editor that is upwards compatible to Vi. It can be used
to edit all kinds of plain text. It is especially useful for editing
programs.

I am not going for a vi text editor full course here. Just a basic vi/vim text editor guide to help you using and editing files in Ubuntu command line. Let's continue.

From the synopsis above, we can simply create or open file using this format:

luzar@ubuntu:~$ vi /path/filename.txt

or

luzar@ubuntu:~$ vim /path/filename.txt

The first thing you should know is vi has two modes. Please keep this in your mind. Most users got confused and find it hard to use vi editor because of this. Well, I'll show you my way.
  1. Command mode - This is the default mode. When you invoke vi from the Ubuntu command line, you'll have this mode.
  2. Insert mode - This is where you can insert content in the file. In other words, you can only type text in this mode.
Remember when we open vi, we'll be in command mode. To begin with, just note a few commands:
  1. i - to insert text. When you press i, you'll be in insert mode.
  2. a - append text. When you press a, you'll be in insert mode.
Some important keys in vi text editor command mode:
  1. x - to delete text. Press x to delete one character at a time.
  2. dd - to delete line. Press dd to delete one line at a time.
  3. u - undo. Back one previous step.
  4. yy - yank. Copy one line.
  5. p - paste.
  6. / - search forward.
  7. ? - search backward.
Please remember, these actions can be done only in vi command mode. However, we can use backspace and delete key in vim insert mode.

Move cursor in vi text editor:
  1. l - move cursor forward.
  2. f - move cursor backward.
  3. j - move cursor down.
  4. k - move cursor up.
In vim, just use up/down, left/right arrow keys to move the cursor.

Exit vi text editor:
  1. ZZ - exit vi and save. (upper case!)
  2. :wq - save and quit vi.
  3. :q - quit without saving.
  4. :q! - force quit without saving.
  5. :wq! - save and force quit.
In vi insert mode (when you press i or a), just remember one important key:
  • Esc - exit insert mode.
My final tip, if you are using vi text editor, remember the insert mode is for input text only so press Esc every time you finish typing.

That's it. Happy editing in Ubuntu command line terminal.

Ubuntu add user command line

After working some times with Ubuntu, maybe it's time you need to create a new user account in your system. There are two common ways of creating user account in Ubuntu. One is using the traditional Linux useradd command. The other one is adduser command.

The different between useradd and adduser command:
  1. The useradd command is a lower level utility to create user. That means like other traditional Unix commands, it's powerful, has many options that you can use to customize user account such as home directory and groups.
  2. The adduser command is an upper level utility to create user. The command is suitable for new system administrator or new Ubuntu server user. It guides user step by step and automatically create user id(uid), group id(gid), create home directory, and copying files from `/etc/skel' to user home directory.
This is an example of Ubuntu add user command line:

luzar@ubuntu:~$ adduser aura
adduser: Only root may add a user or group to the system.
luzar@ubuntu:~$ sudo adduser aura
[sudo] password for luzar:
Adding user `aura' ...
Adding new group `aura' (1001) ...
Adding new user `aura' (1001) with group `aura' ...
Creating home directory `/home/aura' ...
Copying files from `/etc/skel' ...
Enter new UNIX password:
Retype new UNIX password:
passwd: password updated successfully
Changing the user information for aura
Enter the new value, or press ENTER for the default
Full Name []: auravisya
Room Number []:
Work Phone []:
Home Phone []:
Other []:
Is the information correct? [y/N] y
luzar@ubuntu:~$

That's very easy, isn't it?

Ubuntu server login as root

As you already know, Ubuntu does not prompt for root password during installation process. Ubuntu just asked to create a normal user account and to provide password for the user. What about the root account and root password? Perhaps it use the same password as the user account we created? Let's try:


We got login incorrect. No. That's not the Ubuntu root password. Then how do we login as root into Ubuntu server?

All Linux distributions created root account during installation. In Ubuntu server case, the root account has been disable for safety purpose. You know, root can do anything in the system. Like the agents in the Matrix, you know. So, Ubuntu has reasons not to let user login into the system using root. But if you really need to login with root anyway, then here is how I do it:

Firstly, login with the normal user account we created during the installation. Then issue this command: sudo passwd root. See example below:

luzar@ubuntu:~$ sudo passwd root
[sudo] password for luzar:
Enter new UNIX password:
Retype new UNIX password:
passwd: password updated successfully
luzar@ubuntu:~$


The sudo command give us root privilege to change the password for user root. When we press enter, Ubuntu server will ask for user password. This is the normal user account password, not the root password. So, enter the user password. Then, Ubuntu will ask for the new UNIX password. Now this is our root password. So enter whatever you choose to be your root password. You are going to be asked to enter the root password again for confirmation. If Ubuntu confirm the password update with this:
passwd: password updated successfully, then the root password setup is successful.

We can logout and test our root account like the example below:


That's it. Please remember that root is the most powerful user in Linux system. Login as root only for administration purposes only. I would recommend login as a normal user and use sudo command. If you are not comfortable with sudo, then switch to root with su command. You can switch back to normal user with exit command after finished your administration tasks.