Custom Search

How to copy a long file name from thumb drive?

When copying files and directories from thumb drive or usb drive, we always dealing with windows file. There is no problem if you are using Ubuntu desktop because you just right-click the file, copy and paste it in your Linux. In Ubuntu server we are working in the command line terminal. To copy a long file name with white space need some creativity.

Here are some tips on how to copy longer file name with white space from thumb drive/usb drive in Linux command line terminal:

We need to add a backslash at the end of every words in the file name. Here is an example on how to copy longer file with white space:

kucing@ubuntu-server:/media/disk$ ls | grep Linux

Linux copy command tutorial.txt

Linux copy windows file.txt

Linux command copy file example01.txt


Type cp and the first word in the file name:

 kucing@ubuntu-server:/media/disk$ cp Linux


Pressing the tab key wouldn't help here. What you have to do is to put a backslash after the first word:

kucing@ubuntu-server:/media/disk$ cp Linux\ 


Press spacebar to put a white space and key in the second word:

kucing@ubuntu-server:/media/disk$ cp Linux\ copy\


Repeat steps above if you have a long file name.

kucing@ubuntu-server:/media/disk$ cp Linux\ copy\ windows\ file.txt /home/tutorials/


That's it. A simple thing but can cause a headache for a Linux beginner.

Add another admin in Ubuntu server

There are several reasons why we need extra admin user in Ubuntu server. One of the reason perhaps it's an account for your boss. Yes, in several occasions, your boss needs root privilege to do whatever 'his job' that need to be done.

Well, whatever your reason is, here is how you can add another user in the admin group in Ubuntu server:

Login into Ubuntu server using user in admin group username(user with root privilege). This is the user that can use 'sudo' command, or the default user you created during Ubuntu server installation.

In the command prompt, type:

luzar@ubuntu:~$ sudo adduser jimi admin
Adding user `jimi' to group `admin' ...
Adding user jimi to group admin
Done.
luzar@ubuntu:~$


Replace jimi with a username that you want to add to the admin group. Let's check the /etc/group file to see whether the user has been added to the admin group:

luzar@ubuntu:~$ cat /etc/group


Here is the result:

luzar:x:1000:
lpadmin:x:112:
sambashare:x:113:
admin:x:114:luzar,jimi
programmer:x:1001:luzar
dhcpd:x:115:
jimi:x:1002:


That's it. Now jimi can run whatever commands that needs root privilege by using sudo command. He has the same power as you now.

How to check Ubuntu server Linux version

If you are a Windows user before, there is no ver command in Linux that can be used to check the version of Ubuntu server.  In  Linux  or  Ubuntu  server specifically, there are many commands that can be used to check operating system version.

The first command that can be used to check Ubuntu server version is, as Ubuntu suggest, the lsb_release -a command. Here is the example:

luzar@ubuntu:~$ lsb_release -a
No LSB modules are available.
Distributor ID: Ubuntu
Description:    Ubuntu 8.10
Release:        8.10
Codename:       intrepid
luzar@ubuntu:~$

Second command that we can use to check Linux version is cat /proc/version. See example below:

luzar@ubuntu:~$ cat /proc/version
Linux version 2.6.27-14-server (buildd@palmer) (gcc version 4.3.2 (Ubuntu 4.3.2-1ubuntu12) ) #1 SMP Wed Apr 15 19:44:38 UTC 2009
luzar@ubuntu:~$
 
We can also view all information about Ubuntu server using uname -a option:

luzar@ubuntu:~$ uname -a
Linux ubuntu 2.6.27-14-server #1 SMP Wed Apr 15 19:44:38 UTC 2009 i686 GNU/Linux

There you go. We've got more information than what we ask for. Well, that's good, isn't it?

How to add user to a group in Linux operating system

We can assign user to a group during adding a new user account. But how do we add existing user to a group? This tutorial is a guide on how to add user to a new group. The right Linux command for the job is the usermod command.

This is some information about Linux usermod command from manual page:

NAME
usermod - modify a user account

SYNOPSIS
usermod [options] LOGIN

DESCRIPTION
The usermod command modifies the system account files to reflect the
changes that are specified on the command line.


As you can see, the Linux usermod command can be used to modify a user account. However in this tutorial, we'll only use usermod command to add user to a new group. For this example, we'll create a new group to practice. Use the groupadd command to create a new group:

luzar@ubuntu:~$ groupadd programmer
groupadd: unable to lock group file
luzar@ubuntu:~$ sudo groupadd programmer
[sudo] password for luzar:
luzar@ubuntu:~$

Don't forget to use sudo command in Ubuntu, else you'll get the groupadd: unable to lock group file error as in the example above. Check whether the programmer group has been created in /etc/group file:

luzar@ubuntu:~$ less /etc/group | grep programmer
programmer:x:1001:
luzar@ubuntu:~$

Next, we are going to add user to a new group. For this example, we are going to add a user called luzar to the programmer group. Below are step by step instructions.

Use usermod -G option to add user to a new group:

luzar@ubuntu:~# sudo usermod -G programmer luzar

Use Linux groups command to check whether the programmer group has been added to luzar's group:

luzar@ubuntu:~# groups luzar
luzar : users programmer
luzar@ubuntu:~#

As you can see, the user luzar now has programmer as a second group. We can also check /etc/group to verify user currently in the programmer group:

luzar@ubuntu:~$ less /etc/group | grep programmer
programmer:x:1001:luzar
luzar@ubuntu:~$

That's all.

How to mount external hard drive in Ubuntu server

This is a step by step guide on how to mount external hard drive in Linux for Ubuntu server beginner and Linux beginner in general. The guide includes error happened during the process to show how it to mount device in real situation.

Mount external hard drive in Ubuntu server

Insert external hard drive usb connector into the Ubuntu server usb port.  Ubuntu server automatically detect the external hard drive as a usb device. Below is the example screenshot when ubuntu detected the external hard drive:

 
We can see that the external hard drive has been detected as sdb. That is the name of the external hard drive to use when we are going to mount the device. We can check the device in /proc/scsi/scsi file. To do that, issue the command as in the example below:

luzar@ubuntu:~$ cat /proc/scsi/scsi
Attached devices:
Host: scsi1 Channel: 00 Id: 00 Lun: 00
  Vendor: NECVMWar Model: VMware IDE CDR10 Rev: 1.00
  Type:   CD-ROM                           ANSI  SCSI revision: 05
Host: scsi2 Channel: 00 Id: 00 Lun: 00
  Vendor: VMware,  Model: VMware Virtual S Rev: 1.0
  Type:   Direct-Access                    ANSI  SCSI revision: 02
Host: scsi3 Channel: 00 Id: 00 Lun: 00
  Vendor: Generic  Model: USB Disk         Rev: 9.02
  Type:   Direct-Access                    ANSI  SCSI revision: 02
luzar@ubuntu:~$

Create a proper directory in Ubuntu server to mount the external hard drive. In this example, we create a directory named extdisk in /mnt directory:

luzar@ubuntu:~$ sudo mkdir /mnt/extdisk
[sudo] password for luzar:
luzar@ubuntu:~$ ls /mnt/
dvd  extdisk  usb  win

Now we can mount the external hard drive with Linux mount command:

luzar@ubuntu:~$ sudo mount /dev/sdb /mnt/extdisk/
mount: you must specify the filesystem type

The external hard drive cannot be mounted. This happened when we mount a windows formatted external hard drive. We must specify the filesystem. Windows filesystem format is known as nsfs-3g in Linux. So we mount the external hard drive again with the complete command:

luzar@ubuntu:~$ sudo mount -t ntfs-3g /dev/sdb /mnt/extdisk/
NTFS signature is missing.
Failed to mount '/dev/sdb': Invalid argument
The device '/dev/sdb' doesn't have a valid NTFS.
Maybe you selected the wrong device? Or the whole disk instead of a
partition (e.g. /dev/hda, not /dev/hda1)? Or the other way around?

We still cannot mount the external hard drive. Again, we mount the external hard drive but this we change the device name from /dev/sdb to /dev/sdb1 as suggested by Ubuntu message above.

luzar@ubuntu:~$ sudo mount -t ntfs-3g /dev/sdb1 /mnt/extdisk/
luzar@ubuntu:~$ ls /mnt/extdisk/
ghost dell170l  ghost mimos  RECYCLER  System Volume Information
luzar@ubuntu:~$

We successfully mounted the external hard drive this time. Now that the external drive has been mounted, we can use it as other directory in Ubuntu.

To unmount the external hard drive, we can use the Linux umount command like in the example below:

luzar@ubuntu:~$ sudo umount /mnt/extdisk/
[sudo] password for luzar:
luzar@ubuntu:~$

That's all.

How to power off Ubuntu server with Linux shutdown command

The Linux shutdown command has several options that you can use to bring down the Linux system. In the previous post, we've seen how to reboot Ubuntu server with shutdown command. In this post,  we are going to use the Linux shutdown command again. This time is to power off the Ubuntu server.

There are several options available with shutdown command that can be used to power off Linux system. One example is -h option, which means to halt the system after it has been brought down. We can add other things such as a comment message when invoking shutdown -h command. As you can see from the example of Ubuntu restart post before, we have to specify a time argument after the shutdown option so the system know when to shutdown the system. Here are some examples on how to power off Ubuntu server using shutdown command with other things that you can do:

1) Using Linux shutdown command with -h option example:

luzar@ubuntu:~$ sudo shutdown -h now
[sudo] password for luzar:

Broadcast message from luzar@ubuntu
        (/dev/pts/0) at 11:32 ...

The system is going down for halt NOW!

The example above show a basic shutdown command used to power off Ubuntu server. We used '-h' option and a time argument 'now' which means to bring down the system after we press enter.

 2) Using Linux shutdown command -p option example:

luzar@ubuntu:~$ sudo shutdown -h -P +1

Broadcast message from luzar@ubuntu
        (/dev/pts/0) at 11:47 ...

The system is going down for power off IN ONE MINUTE! 

The example above shows the '-P' option is added after the '-h' option. The -P option means 'power off'. When -P is used after -h option, it means we tell the system to power off after the system halt. Also this time we used +1 in the time argument. That means we want to bring down the system after 1 minute.

3) If you have to warn all your users, you can write a message after the time argument. See the example below:

luzar@ubuntu:~$ sudo shutdown -h -P +3 Please save your work now!

Broadcast message from luzar@ubuntu
        (/dev/pts/0) at 11:57 ...

The system is going down for power off in 3 minutes!
Please save your work now!
shutdown: Shutdown cancelled

If you want to cancel shutdown after invoked the command, you can press Ctrl+C combination keys. That will work if you do not use the 'now' time argument. If you just want to warn users to log out and prevent other user to login without actually bring the system down, you can use '-k' option.

luzar@ubuntu:~$ sudo shutdown -k +3 Please save your work now!

Broadcast message from luzar@ubuntu
        (/dev/pts/0) at 12:11 ...

The system is going down for maintenance in 3 minutes!
Please save your work now!
luzar@ubuntu:~$

That's all.

Restart Ubuntu server

There are many commands that can be used to restart Ubuntu Server. We are going to look at some of them that I remember. The first one is the reboot command. In Linux reboot means restart. To use the reboot command, invoke reboot at the command line terminal. You must have root privilege, so add sudo before reboot.

Restart Ubuntu server with reboot command example:

luzar@ubuntu:~$ sudo reboot 
[sudo] password for luzar:

The second command that can be used to restart Ubuntu server is the shutdown command. In Ubuntu, you can use shutdown command to bring down the system to restart or to power off the system. That depends on the option given with shutdown command. To restart Ubuntu system with shutdown command, use shutdown with -r option and provide time to shutdown the system. See the example below.

Restart Ubuntu server with shutdown command example:

luzar@ubuntu:~$ sudo shutdown -r 18:00
[sudo] password for luzar:

Broadcast message from luzar@ubuntu
        (/dev/pts/0) at 16:24 ...

The system is going down for reboot in 96 minutes!

Broadcast message from luzar@ubuntu
        (/dev/pts/0) at 16:30 ...

The system is going down for reboot in 90 minutes!

Press Ctrl+c to cancel restart.

The system is going down for reboot in 90 minutes!
shutdown: Shutdown cancelled
luzar@ubuntu:~$

You can use shutdown command to restart the system on the spot using now as the time argument. See an example below:

luzar@ubuntu:~$ sudo shutdown -r now
[sudo] password for luzar:

Broadcast message from luzar@ubuntu
        (/dev/pts/0) at 16:44 ...

The system is going down for reboot NOW!

That's the command that you can used to restart Ubuntu server system if you have to.

How to change hostname in Ubuntu server

Change a hostname in Ubuntu server is very easy. From the command line terminal, type hostname newname. View the new hostname with hostname command. See the step by step example on how to change Ubuntu server hostname below:


1) View current hostname:

luzar@hitam:~$ hostname
hitam
luzar@hitam:~$


2) Change hostname and view latest hostname:

luzar@hitam:~$ sudo hostname ubuntu
luzar@hitam:~$ hostname
ubuntu
luzar@hitam:~$


See, that's how easy it is. Heh, don't fall for it. That doesn't change anything. The hostname is still the same as you can see at the prompt. Even reboot won't change anything. The exact method to change the hostname permanently is by editing /etc/hostname file. Here is the step:


1) Open /etc/hostname with your favorite text editor:

luzar@hitam:~$ sudo vim /etc/hostname
[sudo] password for luzar:


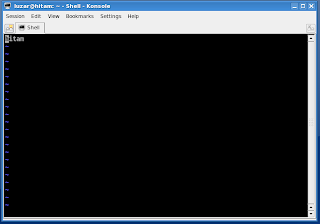
Here the vim /etc/hostname screenshot:


Now you can change hostname and save. The changed is permanent even after you reboot your system.

Important: You also need to edit the /etc/hosts file and apply the changes. Otherwise, you won't be able to use sudo after the reboot.

That's it.

Ubuntu tail log tutorial

Sometimes we need to view just a part of a big Ubuntu file. For example. when we are going to locate error or check system activity in Ubuntu system log. Ubuntu command that can be used to check for latest log generated by the system is tail command. The tail command by default displays last 10 lines in the file.

Here is part of tail manual page that describes the usage:

NAME
       tail - output the last part of files

SYNOPSIS
       tail [OPTION]... [FILE]...

DESCRIPTION
       Print  the  last 10 lines of each FILE to standard output.
       With more than one FILE, precede each with a header giving
       the file name.  With no FILE, or when FILE is -,
       read standard input.

If we are going to check latest system log, we can issue tail /var/log/messages command. See an example below:

luzar@ubuntu:/var/log$ tail /var/log/syslog
Feb 11 09:30:01 ubuntu console-kit-daemon[5150]: CRITICAL: 
cannot initialize libpolkit
Feb 11 09:30:01 ubuntu /USR/SBIN/CRON[5213]: (root) CMD ([ -x 
/usr/sbin/update-motd ] && /usr/sbin/update-motd 2>/dev/null)
Feb 11 09:32:12 ubuntu dhclient: DHCPREQUEST of 172.16.153.129 on eth0 
to 172.16.153.254 port 67
Feb 11 09:32:12 ubuntu dhclient: DHCPACK of 172.16.153.129 from 172.16.153.254
Feb 11 09:32:12 ubuntu dhclient: bound to 172.16.153.129 -- renewal in 899 seconds.
Feb 11 09:40:01 ubuntu console-kit-daemon[5260]: CRITICAL: 
cannot initialize libpolkit
Feb 11 09:40:01 ubuntu /USR/SBIN/CRON[5323]: (root) CMD ([ -x 
/usr/sbin/update-motd ] && /usr/sbin/update-motd 2>/dev/null)
Feb 11 09:47:11 ubuntu dhclient: DHCPREQUEST of 172.16.153.129 on eth0 
to 172.16.153.254 port 67
Feb 11 09:47:11 ubuntu dhclient: DHCPACK of 172.16.153.129 from 172.16.153.254
Feb 11 09:47:11 ubuntu dhclient: bound to 172.16.153.129 -- renewal in 883 seconds.
luzar@ubuntu:/var/log$

We can use tail to check latest messages generated by system log, we can issue tail /var/log/messages command. See an example below:

luzar@ubuntu:~$ tail /var/log/messages
Feb 11 09:06:04 ubuntu kernel: [    8.354312] lp0: using parport0 
(interrupt-driven).
Feb 11 09:06:04 ubuntu kernel: [    8.427308] Adding 489940k swap on /dev/sda5.
Priority:-1 extents:1 across:489940k
Feb 11 09:06:04 ubuntu kernel: [    8.462337] EXT3 FS on sda1, internal journal
Feb 11 09:06:04 ubuntu kernel: [    8.707586] ip_tables: (C) 2000-2006 
Netfilter Core Team
Feb 11 09:06:04 ubuntu kernel: [    8.746051] eth0: link up
Feb 11 09:06:04 ubuntu kernel: [   13.362431] NET: Registered protocol family 17
Feb 11 09:06:04 ubuntu kernel: [   20.601093] NET: Registered protocol family 10
Feb 11 09:06:04 ubuntu kernel: [   20.611324] lo: Disabled Privacy Extensions
Feb 11 09:26:09 ubuntu -- MARK --
Feb 11 09:46:09 ubuntu -- MARK --
luzar@ubuntu:~$

Remember that tail command is very useful command when troubleshooting error during Ubuntu server configuration.

Ubuntu w3m web browser tutorial

Ubuntu server default web browser is w3m. You may already know that Ubuntu server didn't come with x-window, that means no gnome or kde. So as you have guess, w3m is a text-based web browser. And when I said w3m is a default Ubuntu web browser, that means it's already in the system when you finished installed Ubuntu server.
Other than being a web browser, w3m also capable of viewing a text file or a local html file. That means w3m can be a pager too such as less or more command. Let's look at w3m syntax.

Syntax:
usage: w3m [options] [URL or filename]

The options is optional. To view a webpage, you just type w3m www.website.com. Here is a screenshot example of a google search engine opened using w3m:


To quit w3m, press q:

Do you want to exit w3m? (y/n)

Answer n to quit w3m.
Below are options available to use with w3m. You can view w3m options with w3m -help command.

luzar@ubuntu:~$ w3m -help
w3m version w3m/0.5.2, options lang=en,m17n,image,color,ansi-color,mouse,gpm,menu,cookie,ssl,ssl-verify,
external-uri-loader,w3mmailer,nntp,gopher,ipv6,alarm,mark,migemo
usage: w3m [options] [URL or filename]
options:
    -t tab           set tab width
    -r               ignore backspace effect
    -l line          # of preserved line (default 10000)
    -I charset       document charset
    -O charset       display/output charset
    -B               load bookmark
    -bookmark file   specify bookmark file
    -T type          specify content-type
    -m               internet message mode
    -v               visual startup mode
    -M               monochrome display
    -N               open URL of command line on each new tab
    -F               automatically render frame
    -cols width      specify column width (used with -dump)
    -ppc count       specify the number of pixels per character (4.0...32.0)
    -ppl count       specify the number of pixels per line (4.0...64.0)
    -dump            dump formatted page into stdout
    -dump_head       dump response of HEAD request into stdout
    -dump_source     dump page source into stdout
    -dump_both       dump HEAD and source into stdout
    -dump_extra      dump HEAD, source, and extra information into stdout
    -post file       use POST method with file content
    -header string   insert string as a header
    +           goto  line
    -num             show line number
    -no-proxy        don't use proxy
    -4               IPv4 only (-o dns_order=4)
    -6               IPv6 only (-o dns_order=6)
    -no-mouse        don't use mouse
    -cookie          use cookie (-no-cookie: don't use cookie)
    -pauth user:pass proxy authentication
    -graph           use graphic character
    -no-graph        don't use graphic character
    -s               squeeze multiple blank lines
    -W               toggle wrap search mode
    -X               don't use termcap init/deinit
    -title[=TERM]    set buffer name to terminal title string
    -o opt=value     assign value to config option
    -show-option     print all config options
    -config file     specify config file
    -help            print this usage message
    -version         print w3m version
    -reqlog          write request logfile
    -debug           DO NOT USE
luzar@ubuntu:~$  

Ubuntu scp command guide

There are many methods available to copy files from Ubuntu server. The common method is file transfer protocol. You can see that in my previous post, Ubuntu ftp guides. Another way of copying files from Ubuntu server is using scp command. Let's see a brief information about scp from manual page:


NAME
scp -- secure copy (remote file copy program)

SYNOPSIS
scp [-1246BCpqrv] [-c cipher] [-F ssh_config] [-i identity_file]
[-l limit] [-o ssh_option] [-P port] [-S program]
[[user@]host1:]file1 ... [[user@]host2:]file2

DESCRIPTION
scp copies files between hosts on a network. It uses ssh(1) for data
transfer, and uses the same authentication and provides the same security
as ssh(1). Unlike rcp(1), scp will ask for passwords or passphrases if
they are needed for authentication.

File names may contain a user and host specification to indicate that the
file is to be copied to/from that host. Local file names can be made
explicit using absolute or relative pathnames to avoid scp treating file
names containing ':' as host specifiers. Copies between two remote hosts
are also permitted.


As you can see from the manual page above, scp is a secure copy command uses ssh protocol to copy files from remote machine. We should know why it's called secure copy. It uses ssh protocol so it means data transferred is encrypted, and authentication is needed to copy the data.


Maybe it's easy for advanced Linux user to read and understand manual page. Can beginner understand the synopsis above and be able to use scp just by referring to the synopsis alone? Some can but mostly can't. So here's a simple scp format for most of you who can't read manual yet:


scp [options] [source_file] [destination_file]


scp [-r -p -v] [user@host:filename] [user@host:filename]


Here is an example of using scp command:


luzar@ubuntu:~$ scp luzar@192.168.1.6:/home/luzar/etc/UserManual.pdf .
luzar@192.168.1.6's password:
UserManual.pdf 100% 3812KB 3.7MB/s 00:00
luzar@ubuntu:~$


The example above demonstrate how to use scp to remotely copy a file. The target(remote server) is luzar@192.168.1.6 and the destination is our current directory (. means current directory). If you want to copy a folder, add -r option for the scp command.